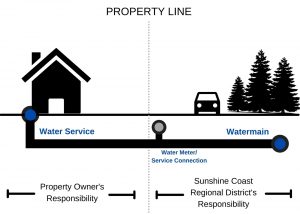
Here are 8 steps to isolating a water leak.
1. Before checking the meter, make sure all taps and water-using appliances inside and outside the house or building are turned off.
2. Lift the lid off the meter box. (Take care not to pry up or tamper with the silver disc embedded in the lid – you are just lifting the lid itself.) Then, flip open the black cover on the meter display, which is light-activated – you may need a flashlight to “wake it.” Check for a water tap icon: if it is on steadily, the meter is detecting continuous water flow. If it is flashing, water is being used more than 12 hours/day, and if it is off, there is no continuous use.
3. Shut off the main water connection to the home or building.
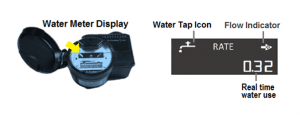
4. Check the meter display (see image below)
- If the RATE is greater than 0, the leak is between the shut off point and the water meter. (i.e. somewhere along the water service line that runs to the home or building)
- If the RATE = 0, the leak is past the shut off point (i.e. an indoor or outdoor water connection at the house or building such as a tap, toilet or irrigation system). Go to step 5.
5. If the leak is past the shut off point, turn the main water connection back on.
6. Through a process of elimination, you can identify the source of the leak. Shut off the water connection to a tap or fixture (only one), then check the water meter to determine if you have isolated the leak.
7. To know if you have found the leaky culprit, check the water meter display:
- If the RATE = 0, the water connection that is off is the cause of the leak
- If the RATE is greater than 0, the water connection that is off is not the cause of the leak.
8. Shut off another water connection and check the water meter display again. Repeat for all water connections inside and outside the house or building until the meter RATE reads 0.00.
 Close
Close